
Overview of Proxies
The concept is not anything new for many experienced editors in After Effects or other programs. There are several different variations and methods to use for this process, but the most efficient ones are the same.
Proxies, by their definition, are a smaller file replacement which you can put in your project in place of your larger actual file. These are often lower resolution and easier to work with. You make your adjustments accordingly, and then, when it’s time to do your final export, replace the proxies with the actual files. This should be standard practice for any video editing project where you have 4K footage or other large-file sizes. Swapping out your files for proxies will probably keep you from crashing and freezing up while you’re working on your project, which is a real time saver!
How to use Proxies for better performance
When dealing with a large project, it’s recommended to use proxies. Adobe After Effects is no exception to this rule. This program is known for its ability to work with 3D motion, multiple dynamic layers, and 4K+ video assets. All of these tasks require a powerful computer to process the data for everything it’s trying to do. Not everyone has the luxury of working on the most recent top-of-the-line machines, and with the evolution of remote workplaces, working on proxies is becoming more essential.
How to Create and use Proxies inside Adobe Premier Pro
When dealing with a large project, it’s recommended to use proxies. Adobe After Effects is no exception to this rule. This program is known for its ability to work with 3D motion, multiple dynamic layers, and 4K+ video assets. All of these tasks require a powerful computer to process the data for everything it’s trying to do. Not everyone has the luxury of working on the most recent top-of-the-line machines, and with the evolution of remote workplaces, working on proxies is becoming more essential.
Creating and using Proxies inside Adobe After Effects
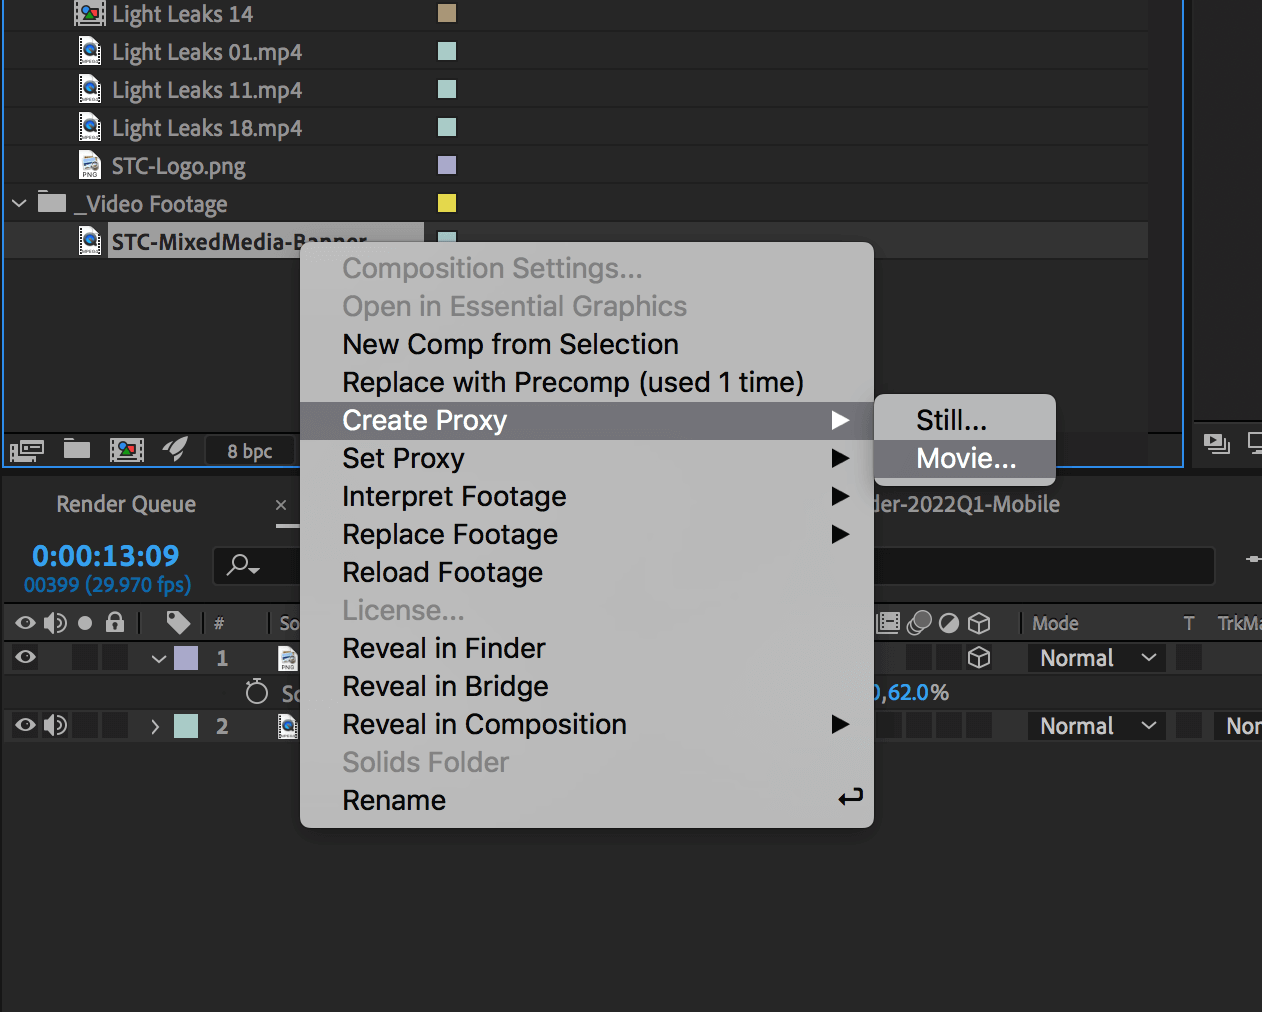
To create a proxy for a large video file or a selection of footage within your project, locate the footage within the project panel and right click. Select Create Proxy > Movie...
For video footage we recommend using a moving image / movie proxy, this will make editing of the project easier to work with. additional assets such as lower thirds, or static assets, we recommend using still image proxies.
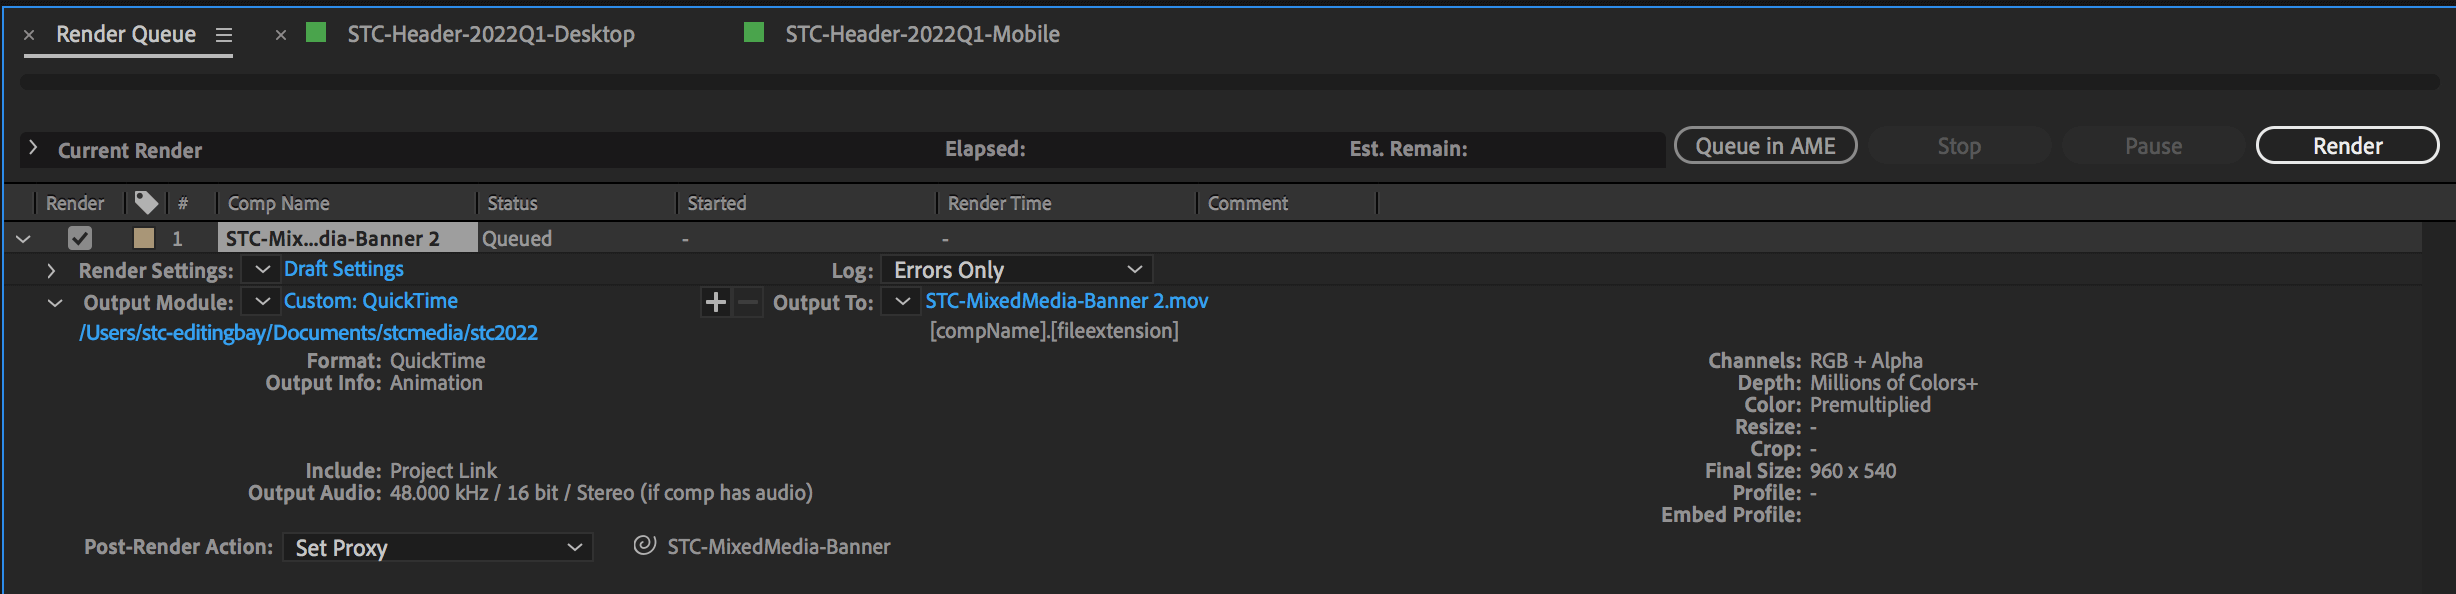
Rendering panel of video proxy layer
After selecting the Video proxy option, the rendering panel will open. In this panel you can select where the proxy version of the video will be saved, and select a Post-render action. By default, After effects will set the action to Set Proxy, which will automatically link the proxy into the right place, and return you to the project panel for further editing.
Small Tree recommends using a centralized proxy folder for each project when working on remote or team projects. Having a centralized cloud proxies folder, you and your team can share proxies with one another, further speeding up the progress for the whole team.
Although rendering a proxy folder may be time consuming, and managing multiple versions of proxies can appear counter productive, but utilizing proxies in a large video project or with large files is vital to editing in Adobe After Effects.
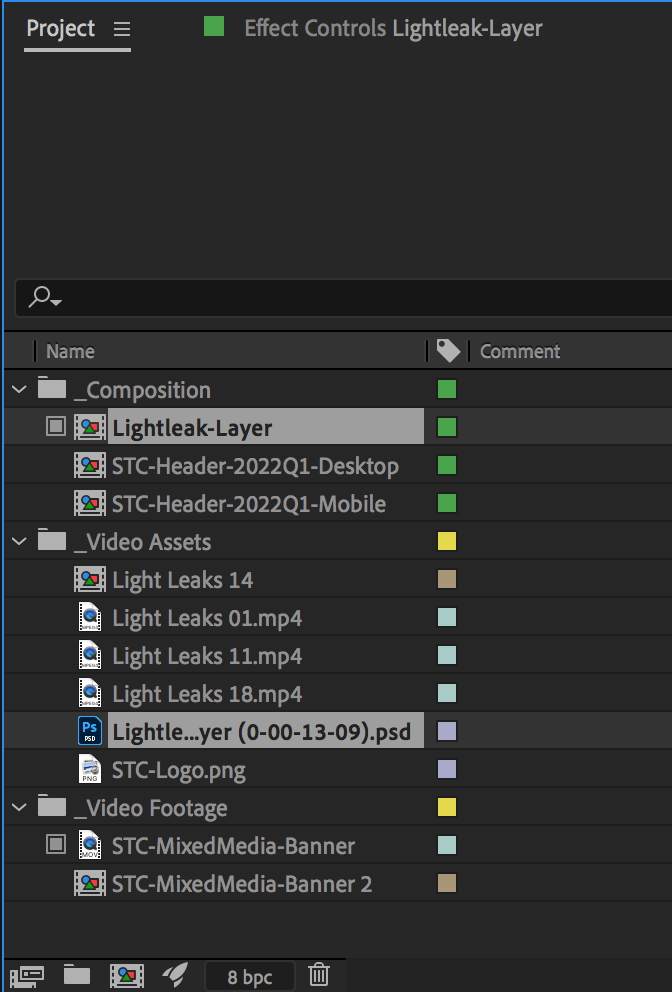
Project panel after the proxy is finished rendering
Your proxy layer is ready!
You can now continue to edit your video using the lower quality footage in place of the larger full resolution file. This will speed up the process and help with working in groups or with remote workspaces. There is also now a toggle that appears to the left of the file name within the project panel. You can switch this to toggle the proxy layer while editing.
Creating and using Proxies inside Adobe After Effects
When dealing with a large project, it’s recommended to use proxies. Adobe After Effects is no exception to this rule. This program is known for its ability to work with 3D motion, multiple dynamic layers, and 4K+ video assets. All of these tasks require a powerful computer to process the data for everything it’s trying to do. Not everyone has the luxury of working on the most recent top-of-the-line machines, and with the evolution of remote workplaces, working on proxies is becoming more essential.
Creating and using Proxies inside Adobe After Effects
To create a proxy for a large video file or a selection of footage within your project, locate the footage within the project panel and right click. Select Create Proxy > Movie...
For video footage we recommend using a moving image / movie proxy, this will make editing of the project easier to work with. additional assets such as lower thirds, or static assets, we recommend using still image proxies.
Rendering panel of video proxy layer
After selecting the Video proxy option, the rendering panel will open. In this panel you can select where the proxy version of the video will be saved, and select a Post-render action. By default, After effects will set the action to Set Proxy, which will automatically link the proxy into the right place, and return you to the project panel for further editing.
Small Tree recommends using a centralized proxy folder for each project when working on remote or team projects. Having a centralized cloud proxies folder, you and your team can share proxies with one another, further speeding up the progress for the whole team.
Although rendering a proxy folder may be time consuming, and managing multiple versions of proxies can appear counter productive, but utilizing proxies in a large video project or with large files is vital to editing in Adobe After Effects.
Project panel after the proxy is finished rendering
Your proxy layer is ready!
You can now continue to edit your video using the lower quality footage in place of the larger full resolution file. This will speed up the process and help with working in groups or with remote workspaces. There is also now a toggle that appears to the left of the file name within the project panel. You can switch this to toggle the proxy layer while editing.